 Now through Dec 16, you have the opportunity to purchase Amazing cards, Beautiful packagine, & Cherished gifts at a 20% discount! Choose from the bundles below! Click on the picture above to download the pdf flier. Email me to order!
 Now through Dec 16, you have the opportunity to purchase Amazing cards, Beautiful packagine, & Cherished gifts at a 20% discount! Choose from the bundles below! Click on the picture above to download the pdf flier. Email me to order!
 Here's the make-&-takes for my Open House Monday evening. This simple card features the new Friends Never Fade stamp set + Greenhouse Gala designer series paper. I love the bright and sunny Daffodil Delight! The 1 1/4" squre punch was used to punch the ds paper. The wording is from my new Fabulous Phrases set! I've been in need of some new word stamps. And the clear mount option is perfect for aligning 2 or 3 words together.
 I used the Bigz Scallop Circle die. The inside of each notepad is regular lined notebook paper, which actually runs through the Big Shot very easily. There's about 25 sheets of paper in each notepad and I think about half of them could be run through the machine at the same time. I used my Crop-o-Dile to punch a hole and tied it all together with some retired ribbon I had on hand. Definitely a fun project that makes a great personalized gift!
 I always love it when something is new to everyone! For those of you who missed out, we made a total of 4 projects:
  I love that this is held together by a little binder clip ring, decorated w/ribbon! This basket uses a 6x6 piece of ds paper. Score at 2" all the way around. Then, score from each corner point to the middle & fold points in. Click here for a tutorial on how to make this PLUS the other basket option.
 I love this little guy! And so easy- just choose your paper and punch! The hardest part is putting the tiny black eyeballs on the whites of the eyes. I used my stylus to help position them onto drops of liquid glue. The finished owls (front/back) were attached to the jumbo paper clip using large glue dots. Someone mentioned that you can find the paper clips at the dollar store! I think I got a big pack of these at the office supply store awhile back. If you don't own this adorable owl punch, you must get it!
 I thought this was very striking! Love the effect! Just a square w/a few folds. Click here for detailed instructions.
 This card kind of has a 'vintage' feel to it. You can get the stencil through SU and there's lots of possibilities for using it & it's very inexpensive! I lined this one up on vanilla cardstock and left a little off the paper. Then, I smooshed VersaMark on top of it, poured on clear embossing powder, & heated with my heat gun. Next, I used a sponge to apply color around the stencil. The embossing part of it 'resists' the ink and makes the image pop out! You can watch a video tutorial here.
 Here's my 1st attempt at a rag quilt! I've made several of the rag quilt bags, so I thought I would give the quilt a try. It was basically the same- just more squares. And actually, after finishing, I wish I would have added even more squares! If you ever try this, keep in mind that if you don't pre-wash your fabric, some of the pieces might shrink during the wash/dry rag process. Plus, the scallop edges kind of curl up more and I just think the whole thing kind of looks smaller. I made this one 6x6, so it's small and could be considered a lap quilt. I used Beatrix Potter flannel fabric + several others including cotton, chenille, & fleece.
  They all worked great together and give the quilt lots of texture. Here's some basic instructions and some pics of the assembling process.


 The Fox & Friends set continues to be one of my favorites! There's just something about those cute little animals! Here's yet another card using this set. I whipped this one up literally in a matter of minutes right before I needed it. I used the Square Lattice embossing folder for the olive cardstock background. I love the texture it leaves! Then, each adorable animal was stamped and then punched with the 1 1/4" square punch and taped to a chocolate chip background. I used the word window punch for the words, which are from a retired baby set, I believe. The ribbon is the new Marina Mist in grosgrain. Don't you love the little heart the monkey holds? SO sweet and easy- I used the small heart punch! If you don't have that one, you should really get it. For only 5.95, it's a bargain & I have used it ALOT! Ok. Yet another quick & simple card!

 I can't believe how many baby thank-you's I've had to make, especially with this being my 4th child! All the gifts and meals have been much appreciated and a true blessings to us. I have to admit, I was seriously tempted to buy store-bought thank-you's, after letting my list pile up! Plus, we received several more gifts on our recent trip to Ohio! Instead, I cut 20, 3x3 whisper white cardstock pieces, stamped a monkey or owl (from Fox & Friends) on each + 'thank you' & taped each one to a 4x4 card in pacific point, real red, tempting turquoise, & pumpkin pie. Very simple and quick. I did this after the kids went to bed one night. Now I'm officially caught up & I didn't compromise the hand-made quality! I actually got the idea from a new blog I was referred to. Check it out here.

 This is a card I made to send to my Dad. Today is his last day of work and he's officially retiring! I'm so happy for him. He will be so much less stressed and relaxed (hopefully!). As a special gift, we also ordered Cleveland Indians tickets for him and my mom.
  No, I have not had my baby- yet! 6 more days and counting! But I have started a batch of thank-you cards. I was completely blessed & spoiled with a church shower on Saturday! I say spoiled because most people don't have showers with a 4th baby! But we believe every baby is a special blessing and celebration & so do my church friends! Anyway, I decided I better get started on my thank-you cards, as the gifts keep coming in! Josiah will definitely be well-stocked with diapers & wipes!
  This card actually has little stamping, but the inspiration came from a tiny sailboat stamp that I have from a retired set. I decided to try to re-create the image & used punches to do so. The bottom of the boat is half of a 1" circle. The sail on the boat is half of a 3/4" square. The boat image is layered on a 1 3/8" circle and then a scallop circle. Notice the tiny button- it's one of the clear bitty buttons from the new summer mini! I tied some blue thread through it and used a glue dot to adhere it to the card. The patterned paper is from last year's SAB package- prints that are perfect for a baby boy! I stamped on the white scallop trim & that completes the card! I love making cards in batches. A hint- cut, punch, & assemble all pieces before putting the cards together. And sometimes this has to be done in several sittings, but it's much quicker than trying to put together one card at a time.
 Well, here is my 2nd attempt at the Big Shot rag quilt purse. Try to overlook the picture quality. I had to take this on my way out the door to actually deliver the bag! I used the scallop squre die + Big Shot to cut the squares, which are a little less than 5". I think this one definitely turned out better than my first, so I was pleased! This adorable little bag is going to a sweet little 3 year old girl as her birthday present. I thought the fabric was perfect for a little girl & I actually have everything cut out to make Isabella an identical bag! I bought the fabric in a bundle, so all of the pieces coordinate. And what a value- the bundle only cost me $6 & I cut 2 bags from it! As you can see from the picture, I used 6 different fabrics, which all coordinate.
  One reason this bag turned out better than my first is because I used cotton batting instead of polyester. I also used a SU gluestick to glue the batting between 2 fabric pieces. This made sewing the squares much easier because everything stayed in place. The other difference in this bag as opposed to my first is that I intentionally left the scallops on the inside, leaving the outside with neat squares. I actually really like that look better. And of course this bag is made up of 4 squares front and back, instead of 9. Let me know what you think!

 The Flower Pot Pocket Card has an insert with a message on it! I love this card because it's so bright and colorful!

 Next, is the Scallop Circle Tote w/Paper Flower embellishment. I love making these flowers & am excited to share with you! Very versatile and lots of options for different styles and looks. As you can see, there's a box in the middle of the two scallops for holding a small gift. Note the Crushed Curry cardstock- this is retiring, so if you love it, stock up before it's too late.
  The Eyelet Border Punch Flower card features yet another paper flower. Very pretty and definitely springy! This flower was made using a 1x12" strip of paper, punched w/the eyelet border punch, & run through the crimper. It's attached to a sticky-strip covered circle. Very fun to make!
 Cute, easy, & still flower-themed! The flower is made from 4 tissue-paper scallop circles, made in the same way as the flower on the circle tote. I attached a magnet to the back which makes this the perfect cheery & useful accent for your fridge!
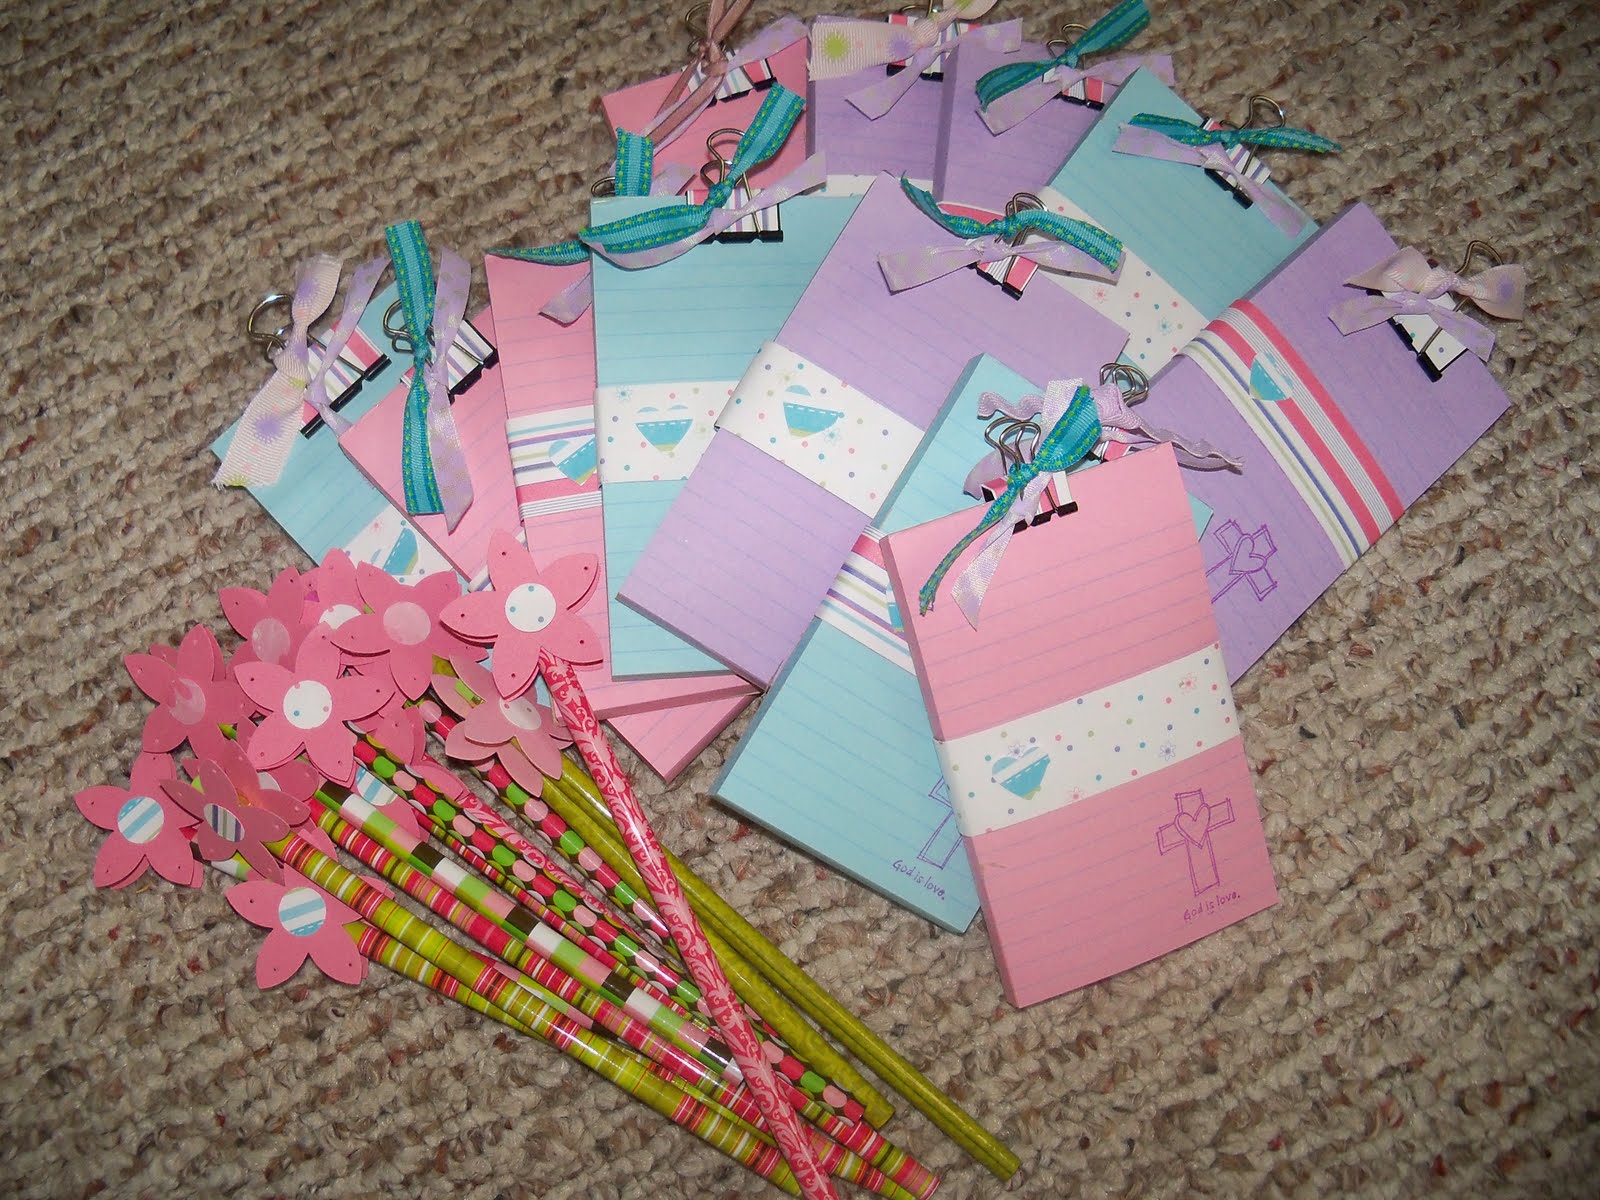 These are the little gift sets I made for the girls in my Awana class for an end-of-year gift. Somehow, amidst the chaos- school, feeding/bathing little ones, backed-up laundry, & last night's dinner dishes, I managed to get these made up! Sometimes I wonder how I get myself into volunteering for these projects!

 I think these make great gift sets! They can even be attached and used as embellishment on a card! The brooches can also be attached to a handbag or other clothing article.
 And by the way, Ruby Red & Crushed Curry will be retiring in June, so get them while you can! I happened to have this card already cut & scored, so I used it. As for Crushed Curry, I have practically a full pack, so I will be trying to incorporate it in near-future projects!

 Here's the rest of the Easter class projects for Monday night (see post below for the watercolor card which is also included). I love the fresh, springy colors! They're fairly easy to put together. Each one features a different embellishment that can really make a big difference in a card. Various sentiments may be substituted for occasions other than Easter. The 4x4 'Happy Easter' note card uses one of the Beautiful Wings Embosslits butterflies. The perfect finishing touch!
 The 'Happiness Always' card uses the SU Beautiful Butterflies die & vanilla hodgepodge hardware- always a WOW factor!
  I used Sweet Pea stitched felt + a button on the card with the cross.
 The basket is from the Baskets & Blooms SU die & a simple bow tied w/grosgrain ribbon.
 Click on any pic to enlarge. I still have space in Monday night's class, $10. Just drop me an email to join! Since I was so late in putting this all together, I will accept late RSVP's all the way through Monday. OR, if you can't make it to the class, I can put a kit together w/instructions.
 I have been meaning to try the watercolor crayon technique and just haven't had a chance until now. It is really alot of fun & very simple! In fact, I think there are various ways to use watercolor crayons. I love the soft effect! The technique I will be demonstrating requires solid stamps, as opposed to line images. The flower image I used is from the hostess set, Of the Earth. This is one of the projects we will make at my class on Monday evening. Please let me know, if you can attend. I will post instructions for this sometime next week.
 Here's a close-up of the lovely flowers!


