


Josiah David Bishop
June 9, 2010- 1:20pm
9lbs, 6oz and 21" long

 No, I have not had my baby- yet! 6 more days and counting! But I have started a batch of thank-you cards. I was completely blessed & spoiled with a church shower on Saturday! I say spoiled because most people don't have showers with a 4th baby! But we believe every baby is a special blessing and celebration & so do my church friends! Anyway, I decided I better get started on my thank-you cards, as the gifts keep coming in! Josiah will definitely be well-stocked with diapers & wipes!
  This card actually has little stamping, but the inspiration came from a tiny sailboat stamp that I have from a retired set. I decided to try to re-create the image & used punches to do so. The bottom of the boat is half of a 1" circle. The sail on the boat is half of a 3/4" square. The boat image is layered on a 1 3/8" circle and then a scallop circle. Notice the tiny button- it's one of the clear bitty buttons from the new summer mini! I tied some blue thread through it and used a glue dot to adhere it to the card. The patterned paper is from last year's SAB package- prints that are perfect for a baby boy! I stamped on the white scallop trim & that completes the card! I love making cards in batches. A hint- cut, punch, & assemble all pieces before putting the cards together. And sometimes this has to be done in several sittings, but it's much quicker than trying to put together one card at a time.
 Well, here is my 2nd attempt at the Big Shot rag quilt purse. Try to overlook the picture quality. I had to take this on my way out the door to actually deliver the bag! I used the scallop squre die + Big Shot to cut the squares, which are a little less than 5". I think this one definitely turned out better than my first, so I was pleased! This adorable little bag is going to a sweet little 3 year old girl as her birthday present. I thought the fabric was perfect for a little girl & I actually have everything cut out to make Isabella an identical bag! I bought the fabric in a bundle, so all of the pieces coordinate. And what a value- the bundle only cost me $6 & I cut 2 bags from it! As you can see from the picture, I used 6 different fabrics, which all coordinate.
  One reason this bag turned out better than my first is because I used cotton batting instead of polyester. I also used a SU gluestick to glue the batting between 2 fabric pieces. This made sewing the squares much easier because everything stayed in place. The other difference in this bag as opposed to my first is that I intentionally left the scallops on the inside, leaving the outside with neat squares. I actually really like that look better. And of course this bag is made up of 4 squares front and back, instead of 9. Let me know what you think!

 The Flower Pot Pocket Card has an insert with a message on it! I love this card because it's so bright and colorful!

 Next, is the Scallop Circle Tote w/Paper Flower embellishment. I love making these flowers & am excited to share with you! Very versatile and lots of options for different styles and looks. As you can see, there's a box in the middle of the two scallops for holding a small gift. Note the Crushed Curry cardstock- this is retiring, so if you love it, stock up before it's too late.
  The Eyelet Border Punch Flower card features yet another paper flower. Very pretty and definitely springy! This flower was made using a 1x12" strip of paper, punched w/the eyelet border punch, & run through the crimper. It's attached to a sticky-strip covered circle. Very fun to make!
 Cute, easy, & still flower-themed! The flower is made from 4 tissue-paper scallop circles, made in the same way as the flower on the circle tote. I attached a magnet to the back which makes this the perfect cheery & useful accent for your fridge!
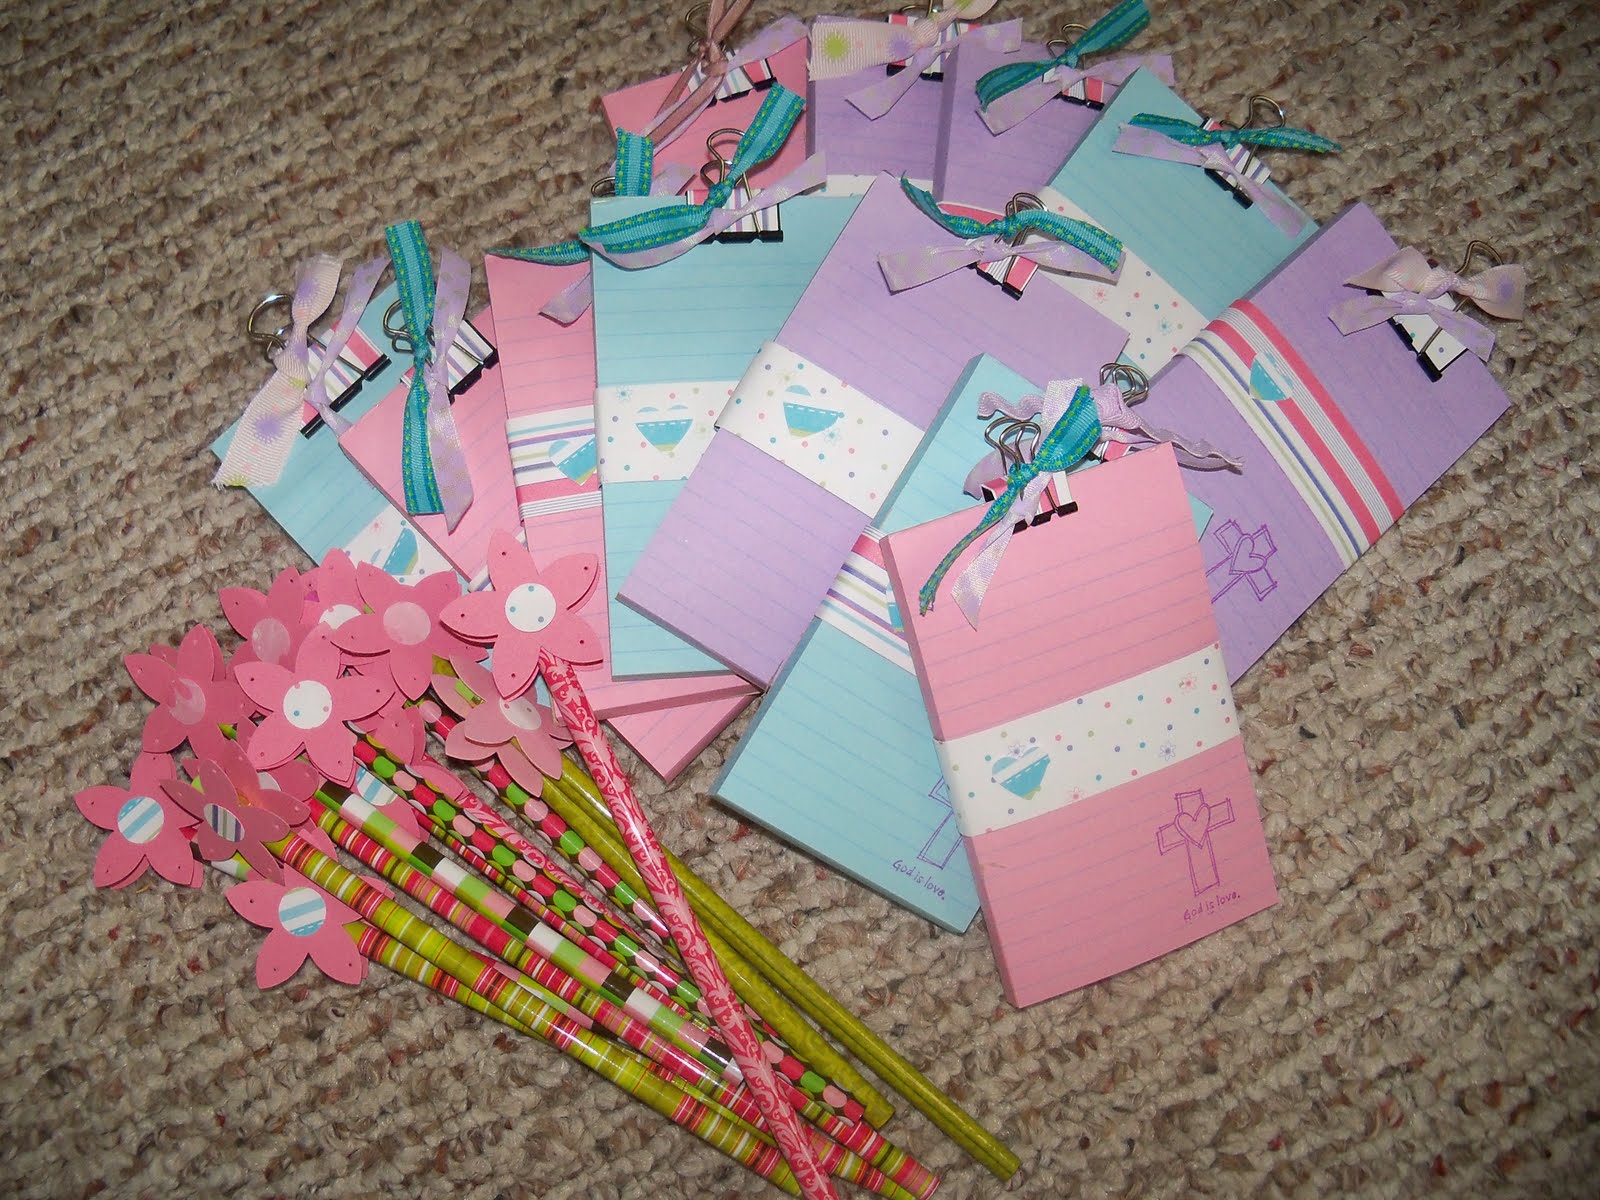 These are the little gift sets I made for the girls in my Awana class for an end-of-year gift. Somehow, amidst the chaos- school, feeding/bathing little ones, backed-up laundry, & last night's dinner dishes, I managed to get these made up! Sometimes I wonder how I get myself into volunteering for these projects!

 I think these make great gift sets! They can even be attached and used as embellishment on a card! The brooches can also be attached to a handbag or other clothing article.
 And by the way, Ruby Red & Crushed Curry will be retiring in June, so get them while you can! I happened to have this card already cut & scored, so I used it. As for Crushed Curry, I have practically a full pack, so I will be trying to incorporate it in near-future projects!

 Here's the rest of the Easter class projects for Monday night (see post below for the watercolor card which is also included). I love the fresh, springy colors! They're fairly easy to put together. Each one features a different embellishment that can really make a big difference in a card. Various sentiments may be substituted for occasions other than Easter. The 4x4 'Happy Easter' note card uses one of the Beautiful Wings Embosslits butterflies. The perfect finishing touch!
 The 'Happiness Always' card uses the SU Beautiful Butterflies die & vanilla hodgepodge hardware- always a WOW factor!
  I used Sweet Pea stitched felt + a button on the card with the cross.
 The basket is from the Baskets & Blooms SU die & a simple bow tied w/grosgrain ribbon.
 Click on any pic to enlarge. I still have space in Monday night's class, $10. Just drop me an email to join! Since I was so late in putting this all together, I will accept late RSVP's all the way through Monday. OR, if you can't make it to the class, I can put a kit together w/instructions.
 I have been meaning to try the watercolor crayon technique and just haven't had a chance until now. It is really alot of fun & very simple! In fact, I think there are various ways to use watercolor crayons. I love the soft effect! The technique I will be demonstrating requires solid stamps, as opposed to line images. The flower image I used is from the hostess set, Of the Earth. This is one of the projects we will make at my class on Monday evening. Please let me know, if you can attend. I will post instructions for this sometime next week.
 Here's a close-up of the lovely flowers!
 I was so excited to make these adorable fabric hair barrettes! I've seen various versions of these on different blogs. I was recently asked to come up with an easy craft project for our Awana TNT girls group at church. I immediately thought of these barrettes & this is my first attempt. I used a combination of scallop circles from sizzix SU Baskets & Blooms & Scallop Circle #2 dies. The circles are each hot glued together and kind of scrunched up, so they don't lay flat. After allowing time to dry, I used my paper piercer to poke a hole in the center and then inserted a brad. The final touch was pulling the edges of the fabric to slightly fray it, giving it a 'shabby chic' look.

 I love the Sweet Pea stitched felt pieces! This card features several of them. Colors used: Certainly celery, rose red, pretty in pink, and chocolate chip. I also like the simple block layout. You could easily change this up with different images or embellishments in each block.


 Well, I finally got the opportunity to play around with the Big Shot for a sewing project! My grandmother recently gave me her sewing machine & I was excited about trying it, although I have no sewing experience! Through the blogging world, I kept hearing that the rag quilt purses were so easy and no big deal! Well, they were basically right!


 Here are the other 2 projects for my Valentine's Class tonight! I've seen the 'kissing birds' idea fluttering around several blogs- so cute. They are really adorable! I love the new punch! The cardstock is kraft & of course the Sending Love Designer paper. It's hard to tell from the pic, but I used a sponge to add burgundy ink around the edges of the birds and their wings to add dimension. I also popped up the wings.
 And this is my first attempt at making a Hanging Heart Basket using the Sizzix Petal Card die! Really easy. Click here for a short tutorial. The hearts & tag are die-cut from some little sizzlits. Besides 2 pieces of the 4.5x4.5 ds paper, I cut a 2x5 piece of real red cardstock which makes the 'pouch.' It's large enough for a small bag of candy or whatever other goodies you can think of! I used brads to attach my ribbon- simply b/cause I was running short. You could also insert eyelets or just punch a hole and knot the ribbon. Very easy!
 The first card pictured features the new Sending Love Specialty DS paper from the Occasions mini. This paper is very pretty & sparkly-lots of glitter! I couldn't decide which pattern to use, so what better way to use 5 on one card than a patchwork pattern! Very little stamping required!
 Next, is the new adorable little SU Mini Milk Carton! This box is really cute! I simply ran the Bigz die through my Big Shot & folded at the score lines. The little bird is from the hostess level 3, 'The More the Merrier' set, punched w/the 1.25" circle. I used yet another pattern from the Sending Love Specialty DS paper (12 in all to choose from!). I may add a band to this- not sure yet- but I wanted to get it posted for you to see. The little clip holds the top together. Just squeeze to open & reveal some goodies!
 This adorable little tea bag holder was actually cut from felt! So fun! I used the Baskets & Blooms exclusive SU die and ran it through my Big Shot (which happens to cut various materials). I changed the felt color for the large flower & added the green button and leaves. The tag is from the sizzlit 4pk- Lots of Tags. I did not use the basket bottom, so this one is flat. I used hot glue to seal the bottom and sides. Another option would be yarn or use your sewing machine.
  Here's the additional card we made at Monday night's class. The Good Neighbor set was so much fun to work with! This is a Sale-a-Bration choice- FREE with any $50 merchandise purchase! Although I threw this card together literally right before the class, I can see endless possibilities for many more! The patterned paper is part of the Designer Series paper pad, Welcome Neighbor--also one of the Sale-a-Bration items which happens to coordinate perfectly with the stamp set!
 I used Whimsical Words (yet another Sale-a-Bration choice!) on the card front as well as on the little tag for the treat bag which goes inside the Fancy Favor bag! I love the 'loopy' script! And, as mentioned in my previous post, the Clear Mount blocks are totally awesome! They're especially convenient for word stamps, as you can see exact placement. Check out the pic- the classic rubber has not been compromised! And notice the dvd storage case in the background. Quite convenient & space-saving!
 And one final little fun project- So Cool rub-ons. I demonstrated how to use them on cute little 3x3 notecards. This is a cute package with fun color combo choices: bashful blue, basic grey, certainly celery, & bermuda bay. I added the little button + thread & stamped a sentiment at the bottom to top it off. I actually used a rub-on on the inside as well, but neglected to picture it. Tons of possibilities with these cute little things.


